Saturday, February 22, 2020

Painting en Plein Air


Recently I spent a month painting with the Emerald Coast Plein Air Painters. These artists meet every week (rain, shine, or fog) along the Gulf shores of the Florida panhandle. While it was usually warm enough to paint outdoors, the weather conditions (especially the winds and high humidity) were not always conducive to my trimmed-down urban sketching travel kit.
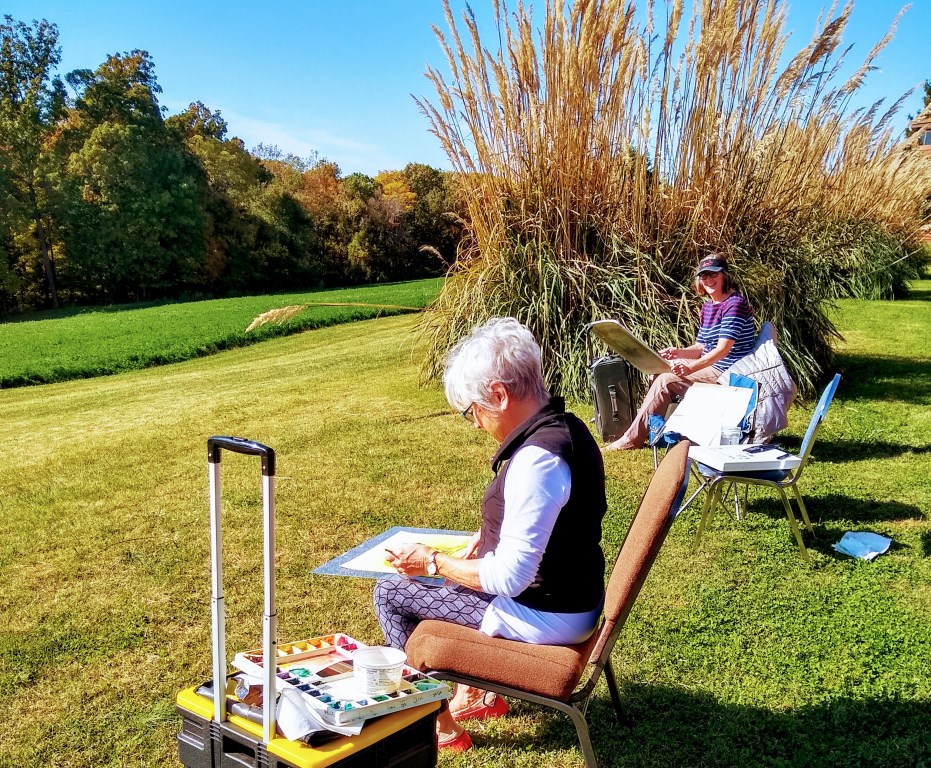
First of all, I discovered that while shoes were optional, an easel is almost an essential paint tool for combatting the winds and capturing the rapidly changing light.
As a minimum, some masking tape and a back board would have been useful for keeping my paper in one place. You can only attach so many binder clips to your journal before they start getting in the way of your hand and brush.
Most of the painters tended to work in acrylics or oils – a much more workable medium under adverse weather conditions and if a little sand blows into your painting, it just adds texture. Some people used brushes, others palette knives, and some even used cut-up credit cards.
A few artists painted in watercolor (my preferred medium), but when you’re painting in high humidity or fog where the paint doesn’t want to dry and there’s no hand-dryer in the restrooms, it’s best to paint wet-in-wet. It would have helped if I’d had good paper and a variety of brushes (like a mop, fan, and liner), rather than my waterbrush and mixed media journal.
The one thing I noticed during our weekly critique was that many of the paintings reflected a mood, rather than a replica of the scene. That’s a very good goal to have when trying to finish a painting in only 3 hours and under varying conditions.
Unfortunately my travel kit was reduced even further when my seat cushion blew off the dock at the marina. But even with my limited supplies, I still had a ball painting with this fun group of people.

Tuesday, December 24, 2019

Sketching in Winter


In an old copy of Artists magazine, I found several articles on winter sketching. After last week’s 6-inch snowfall, I thought I’d give it a try.

Some of the tips I found most intriguing were:

·         focus on the light; let shadows form your composition
·         look for the unusual; a big pile of snow can be very interesting
·         simplify your tools; experiment with different media
·         use a smaller sketchbook; paint thumbnails or vignettes
·         work quickly; get the rough outline down
·         stand on a piece of cardboard to keep your feet insulated; find a sunny spot out of the wind

So with these tips in mind, I set off outdoors taking only my blue Pilot fountain pen, a Crayola marker, a waterbrush, and a small sketchbook. The day was sunny and wind-free, but let’s face it... 20° is cold, even in the sun. I stopped at Starbucks for a warm latte and did my first sketch while looking out the window. Okay, I admit to being a wimp, but truthfully, another magazine tip was to find a window with a good view if you couldn’t stand the cold. After all, we’re urban sketchers; not a plein-aire painters.  I really liked the way the blue ink from my Pilot fountain pen shaded the snow mounds when I hit it with my waterbrush. But I would have preferred a finer line, especially given the tiny sketchbook I was using.
After I finished my latte, I headed off to the park. I didn’t bring any cardboard to stand on, but in hindsight, I can see how that tip should be #1. My feet got very cold, very quickly standing in the snow (and I was wearing heavy boots!). For this sketch, I switched to my Crayola marker. The ink is a little softer and easier to create the shadows you see in the white snow mounds.
In conclusion, while this was a fun experiment, I doubt I’ll ever become an avid outdoor winter sketcher. I need at least 40° to be comfortable. But for those of you who are inspired, the final article in this magazine was on an annual winter painting retreat sponsored by the Outdoor Painters of Minnesota. Those artists have thicker blood than me!

Friday, December 13, 2019

When is a travel kit too small?


On a recent trip to Chicago, I met up with Gail Dokucu, a newly-appointed administrator for the local Urban Sketchers group. Since I was carrying everything in a backpack (clothes, toiletries, and art supplies), I decided to trim down my travel sketch kit to save on volume and weight. My traditional travel kit (shown on the left) includes a Strathmore mixed media journal, Daniel Smith 15 half-pan watercolor box, waterbrush, Tombow markers, Micron pens, pencil, kneaded eraser, a water spritzer, and a foldable seat cushion. For my simple kit (shown on the right), I took a 3x5 field notebook, a mini-set of brush markers, a water-soluble gray ink pen, and a waterbrush. While I opted not to take a watercolor kit, I still wanted the ability to add a little color to my sketches, so I took along 2 Neocolor watercolor crayons.
Before meeting Gail, I found a nice little sketch spot at the Corner Bakery Cafe on Jackson. This particular cafe looks into the 2-story lobby of the historic Railway Exchange building with its large staircase, second floor balcony, and steel-framed atrium. Unfortunately, when I met up with Gail, I spent most of our time talking and touring the building.
So how did I like my slimmed down kit?

Pros:  It was fun sketching in a tiny notebook and I will probably start carrying one with me wherever I go. While the paper in most field notebooks won’t hold up to a lot of water, it seemed to do just fine with the bit of moisture from my waterbrush. Dragging the waterbrush across my water-soluble gray ink lines and watercolor crayon shaded areas is a simple way to create a little depth and interest in my pictures.

Cons:  I missed my watercolor palette A LOT. I went back to the Chicago Cultural Center the next day and just could not capture the richness of that architecture (especially the tiled mosaics) with blue and pink crayons. My Pitt brush pens seemed much more pigmented than my Tombow markers, plus they were not water-soluble. I know some sketchers create gorgeous gray-scale drawings with Pitt pens, but I haven’t developed that skill yet.

So, in conclusion, when traveling I’ll probably stick with my original kit and leave a t-shirt or some other item of clothing at home to compensate for the extra weight and volume. After all, we artists have to have our priorities.

Wednesday, November 13, 2019

Autumn Colors


What I find fascinating about urban sketching is the way artists interpret the exact same scene in such a variety of different ways. On a recent art retreat, one of those gorgeous autumn days when the leaves are at their peak, 4 people sat side-by-side painting the same tree-lined view. The results are intriguing – all of them capturing the richness of fall colors, but each unique in style and expression. What a joy to be a member of such a talented group.

Kathy's painting.
Molly's painting.
Mary Ellen's painting.
Maggie's painting.

Thursday, October 24, 2019

Art Retreat

I spent a few days with some members of the Watercolor Society on an art retreat at the Toddhall Retreat Center in Columbia, Illinois. While not technically an urban sketcher outing, it was still the perfect venue for getting outdoors and doing some late fall painting before winter snows set in.
Some people took advantage of the opportunity to try out new techniques.
Some were very prolific working on multiple paintings at once.
Others were more focused, concentrating on perfecting an individual painting.
There's a camaraderie you develop when you eat, sleep, paint, and socialize 24/7 with people that is different from our 2-hour monthly sketch outings. Everyone is much more relaxed, which I think is reflected in their work.

Sunday, October 20, 2019

Botanical Sketching with Ink and Watercolor

In honor of Inktober, I signed up for a class at St Louis Art Supply in the Central West End on sketching botanicals in ink. The class was taught by Jess Kohnert, a former horticulturalist at the Missouri Botanical Garden, who has coupled her educational background in science with her incredible talent in art. You can follow Jess on Instagram @KOHNERTSTUDIO.
One of the nice things about the art classes at St Louis Art Supply is that the class fee always includes the supplies you will use during the class. This not only makes it easier on the teacher, but I think it pushes you out of your comfort zone in trying out different products. Jess likes to use Micron pens on hot press paper, so for this class we were given 3 sizes of Micron pens (01, 03, and 08), a 6"x6" Speedball Fluid watercolor pad, a white Gelly Roll pen for highlights, a waterbrush, a pencil, and an eraser. 
Jess started the class by giving us dabs of Van Gogh watercolor paint (cobalt blue, yellow lemon, and Quinacridone rose). She thinks stark white backgrounds are intimidating, so she encouraged us to colorize a few backgrounds. By my third sheet, I started playing around painting the flowers on the table. Jess also makes bouquets for the shop with flowers from her own garden.
For our next task, Jess demo'd the 3 different types of line textures that she uses:  hatching, cross-hatching, and stippling. I tried out each of them with my 3 pen sizes, as well as made a color chart of the watercolor primaries. (Side comment - my camera is making these colors look much more vibrant than they actually appeared on my paper.)
Our final task was to draw one of the floral arrangements on the table and shade it with pen and ink. I chose the aloe plant for my drawing, but I found my pink and blue backgrounds distracting, so I just drew it on a fresh sheet of white paper. Jess helped me get started on the shading. She has an extremely light touch allowing her to slowly build up depth and detail in her drawings. I'm a bit heavier handed, but I really liked the technique - a very relaxing way to spend a Saturday afternoon.

Friday, October 18, 2019

Inktober Update


Since I’m halfway through the Inktober challenge, I thought I’d give an update on lessons learned. At the beginning of the month, I set a goal of testing out the wide assortment of pens I’ve collected over the years rather than sticking to the official prompt list. I started by writing out the name of each pen, and then running a waterbrush across it to test its solubility. I like using pens with inks that dissolve in water, because it gives depth to a sketch.
I also stopped by the library and picked up a book on pen and ink sketching. This book by Peter Caldwell gives lots of tips on simulating texture with a black pen.
My 2 favorite pens for sketching with permanent ink are:  (1) Micron and (2) Uniball. If I draw first and then add watercolor, I always start with a Micron pen. There is never any ink bleed and I can get really fine details. However, if I want to go back over a painting to add additional details, I use my Uniball. I’ve ruined more Microns by trying to draw over watercolor (the paint pigment seems to destroy the tip), but the rollerball in the Uniball just glides right over the paint. I don’t tend to use the Uniball for the under-drawing, however, because while its ink is technically permanent, it often takes several minutes to dry completely.
My 3 favorite pens for sketching with water-soluble ink are:  (1) Pilot fineliner marker pen, (2) Pilot Kakuno fountain pen, and (3) Stabilo Point 88 fineliner. I like the Pilot fineliner the best, because it is very easy to draw with and gives incredibly thin lines (good for detail). Plus it seems to release the most ink when touched with water. The Pilot fountain pen is easy to draw with once the ink starts flowing, but if I don't use it every day, I have to play with it a bit. I like the details I get with the fine line of the Stabilo, but I am a bit disappointed in the amount of ink it releases when wet. I find cross-hatching some shaded areas before touching it with the waterbrush works much better for releasing ink with the Stabilo. While all 3 pens come in different colors, I've only been using black; but it is interesting to see the color variations in the ink. The Pilot fineliner yields a blue-gray tone, the Pilot Kakuno a charcoal gray, and the Stabilo a greenish-gray.
During the second half of the month, I plan to experiment with black and gray brush pens – probably Tombow, Blick, and PITT. I’ll let you know how they work out.